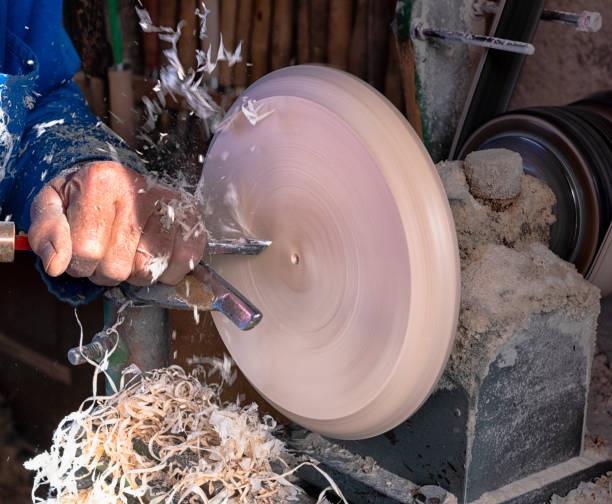
Faceplate turning, also known as bowl turning, involves mounting wood to a faceplate or chuck on the lathe, with the grain running perpendicular to the lathe bed. This technique is ideal for turning bowls, platters, and hollow forms.
Choose wood: Start with dry or green wood. Green wood is easier to turn but may warp.
Cut to size: Use a bandsaw to make a round blank.
Mount to faceplate: Screw the blank securely to the faceplate.
Balance the blank: Ensure it’s centered to avoid vibration.
2. Roughing the Outside
Use the bowl gouge to shape the exterior.
Work from the rim toward the base.
Create a tenon or recess for chuck mounting if needed.
3. Shaping the Profile
Refine the outer shape with smooth, controlled cuts.
Use the scraper for final smoothing.
4. Hollowing the Inside
Reverse the piece (if using a chuck) and begin hollowing.
Use the bowl gouge to remove material from the centre outward.
Maintain consistent wall thickness.
5. Final Touches
Use a round-nose scraper to refine the interior.
Check for symmetry and smooth transitions.
6. Sanding & Finishing
Sand with the lathe running at a slow speed.
Start with coarse grit (e.g., 80) and progress to finer grits (up to 400+).
Apply finishes like oil, wax, or food-safe finishes for bowls.
Buff for a polished look.
Top Tips
Start small: practice with small bowls or shallow platters.
Keep tools sharp: sharp edges make cleaner cuts.
Use light cuts: especially when hollowing.
Watch grain direction: cutting with the grain reduces tear-out.
Check mounting: always ensure the blank is secure before turning.
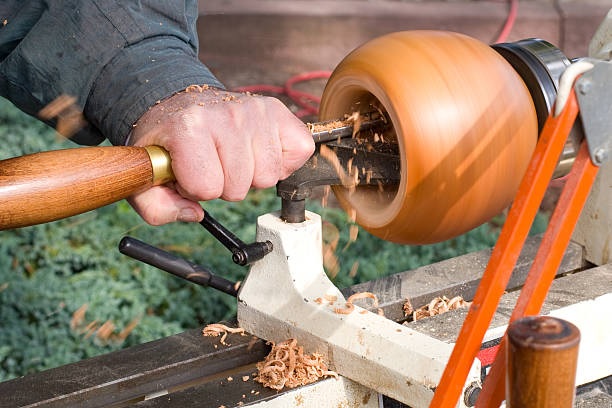
Hollow Turning
Hollow turning involves removing wood from the inside of a mounted blank to create a hollow form. Unlike bowl turning, hollow turning often requires deeper internal cuts and specialized tools to reach inside narrow openings.
Step-by-Step
1. Preparing the Blank
Choose wood: Start with dry or green wood. Green wood is easier to hollow but may warp.
Cut and mount: Use a bandsaw to round the blank and mount it securely using a faceplate or chuck.
Balance the blank: Ensure it’s centered and stable before turning.
2. Shape the Exterior
Use a bowl gouge to shape the outside of the vessel.
Create a tenon or recess for chuck mounting if needed.
Refine the profile before hollowing.
3. Start Hollowing
Begin hollowing from the center using a hollowing tool.
Work slowly and remove material in small increments.
Maintain control and avoid aggressive cuts.
4. Deep Hollowing
Use specialized hollowing tools to reach deeper areas.
A laser or camera system can help monitor wall thickness.
Keep the wall thickness consistent (typically 1/4" to 3/8").
5. Final Interior Shaping
Use scrapers to smooth the inside.
Check for tool marks or uneven surfaces.
Top Tips
Start with shallow forms: deeper hollowing is more advanced.
Use light cuts: especially inside the vessel.
Keep tools sharp: dull tools can catch and tear.
Practice tool control: hollowing tools require finesse.
Check wall thickness often: avoid going too thin.
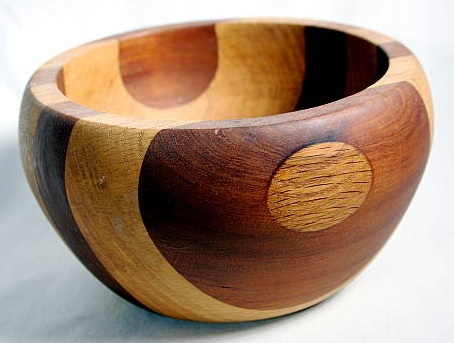
Segmented Turning
Segmented turning is a creative and precise woodturning technique that lets you build stunning patterns and shapes by gluing together multiple pieces of wood before turning. Once glued, the blank is turned on a lathe like any other project.
Step-by-Step
1. Design Your Project
Sketch your design or use software (such as Woodturner Pro, Segmented Woodturning Design, SegTurn, and Turned Wood).
Decide on the number of segments per ring and the number of rings.
Choose wood species for contrast and visual appeal.
2. Cut the Segments
Use a mitre saw or sled to cut segments at precise angles.
For a 12-segment ring, each segment angle is 15° (360° ÷ 12 ÷ 2).
Accuracy is critical—small errors compound during glue-up.
3. Assemble the Rings
Dry-fit each ring before gluing.
Use band clamps or jigs to hold the ring while the glue dries.
Once dry, sand each ring flat using a disk sander or sanding jig.
4. Stack and Glue the Rings
Glue rings one at a time, aligning the grain and pattern.
Clamp and let each layer dry before adding the next.
Use a press or weight to ensure even pressure.
5. Mount and Turn
Mount the blank on a faceplate or chuck.
Begin turning the exterior shape with a bowl gouge.
Hollow the interior carefully, checking wall thickness.
6. Sand and Finish
Sand progressively from coarse to fine grits.
Apply a finish that enhances the wood contrast (oil, lacquer, or shellac).
Buff for a polished look.
Top Tips
Start simple: Try a basic bowl with 3-4 rings and 6-12 segments per ring.
Use contrasting woods: Maple, walnut, cherry, and padauk work well together.
Label your segments: Helps with alignment and pattern consistency.
Check for gaps: Tight joints are essential for strength and appearance.
Practice patience: This is a slow, precise process, but very rewarding!
Green Wood Turning
Green wood turning involves working with wood that still contains moisture, typically freshly cut from a tree. It’s easier to cut, produces less dust, and allows for organic, sometimes unpredictable results as the wood dries and warps.
Step-by-Step
1. Choose your wood
Best for beginners: Maple. Cherry. Walnut. Birch. Poplar
2. Preparing the Blank
Cut the wood: Use a chainsaw or bandsaw to rough out a blank.
Seal the ends: Coat with wax or anchorseal to slow drying and prevent cracking.
Mount securely: Use a faceplate or chuck with strong grip.
3. Rough Turning
Turn the blank into a rough shape while it’s still wet.
Leave walls thick (about 10% of diameter) to allow for drying shrinkage.
Use a bowl gouge or spindle gouge depending on the form.
4. Drying
Let the rough-turned piece dry slowly:
Air dry: Store in a cool, dry place for several months.
Paper bag method: Place in a paper bag with shavings to regulate moisture.
Microwave drying: For small pieces, use short bursts with cooling periods.
5. Final Turning
Once dry, remount the piece and refine the shape.
Turn to final dimensions and smooth the surface.
6. Sanding & Finishing
Sand at low speed to avoid heat buildup.
Use progressively finer grits (start around 120).
Apply finishes like oil, wax, or shellac.
Buff for a smooth, natural look.
Top Tips
Expect movement: Green wood warps as it dries—embrace it!
Keep tools sharp: Wet wood can be fibrous and tough on edges.
Work cleanly: Green wood is wet and messy—protect your workspace.
Practice patience: Drying takes time, but results are worth it.
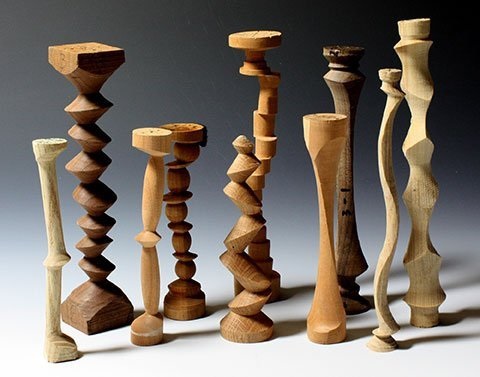
Eccentric / Multi-Axis Turning
Eccentric turning (also called multi-axis turning) involves mounting the wood off-centre or repositioning it during the turning process. This creates non-circular, asymmetrical, or multi-faceted shapes that can’t be achieved with traditional single-axis turning.
Step-by-Step
1. Preparing the Blank
Choose wood: Start with dry, stable wood. Green wood is not ideal due to warping.
Mark multiple centres: Use a centre finder and layout tools to mark different axis points.
Plan your design: Sketch your idea and determine how many axis shifts you’ll need.
2. First Axis Turning
Mount the blank on the primary centre.
Turn the basic shape (e.g., cylinder or partial profile).
Leave material for later axis shifts.
3. Repositioning the Blank
Shift the blank to a secondary centre point.
Re-mount securely using a chuck or faceplate.
Turn new features (e.g., offset beads, lobes, or textures).
4. Repeat for Additional Axes
You can use 2, 3, or more axis points depending on complexity.
Each repositioning creates a new layer of asymmetry.
5. Sanding & Finishing
Sand carefully, eccentric pieces may have uneven surfaces.
Use hand sanding for hard-to-reach areas.
Apply finishes like oil, wax, or lacquer.
Buff gently to avoid catching on uneven edges.
Top Tips
Start simple: Try a 2-axis project like an offset candlestick or spoon.
Use layout tools: Precision is key to consistent results.
Work slowly: Eccentric turning can be unpredictable.
Balance the blank: Uneven mounting can cause vibration.
Practice tool control: Cuts may feel different due to changing grain direction.


 01726 828 388